Why a Shipping Container Is Perfect for Tool Storage
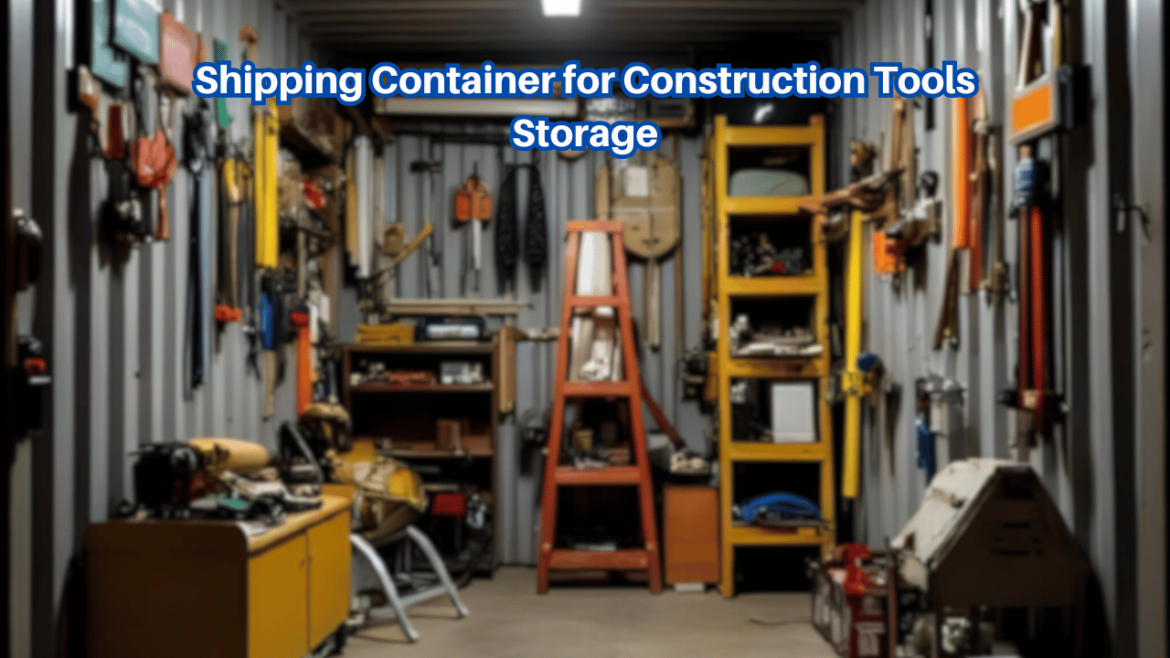
If you’ve ever worked on a construction site, you know how quickly tools can disappear, or worse, get damaged by weather. A shipping container for construction tools storage is a practical solution that keeps equipment safe, organized, and accessible. Essentially, it’s a repurposed steel container that can be modified to fit your exact needs, whether you’re storing hand tools, power tools, or even small machinery.
In practice, using a shipping container gives you the strength of industrial-grade steel walls and the flexibility to install shelves, racks, or climate control units. Unlike traditional wooden sheds or temporary tents, a container is both portable and weatherproof, making it ideal for changing job sites.
Benefits of Using a Shipping Container for Tool Storage
- Security: Containers are built to withstand theft attempts. A heavy-duty lockbox can make unauthorized access nearly impossible.
- Durability: Steel containers resist rain, wind, and UV rays without deteriorating.
- Portability: Need to move to a new construction site? Just load it onto a truck and go.
- Customization: Install lighting, ventilation, or tool racks to fit your workflow.
A common mistake is underestimating the value of proper shelving. In real-life situations, a cluttered container slows down workday productivity. A well-organized layout pays off daily when you can find what you need fast.
How to Set Up a Shipping Container for Construction Tool Storage

Once you’ve secured your container, the next step is setting it up for efficiency. Think of it like designing a workshop inside a steel box, organization and accessibility matter most.
Step 1: Plan Your Layout
Sketch where different tools and materials will go. Keep frequently used ítems, like drills and measuring tapes, close to the door for easy access. Store bulky equipment (like compressors or cement mixers) toward the back.
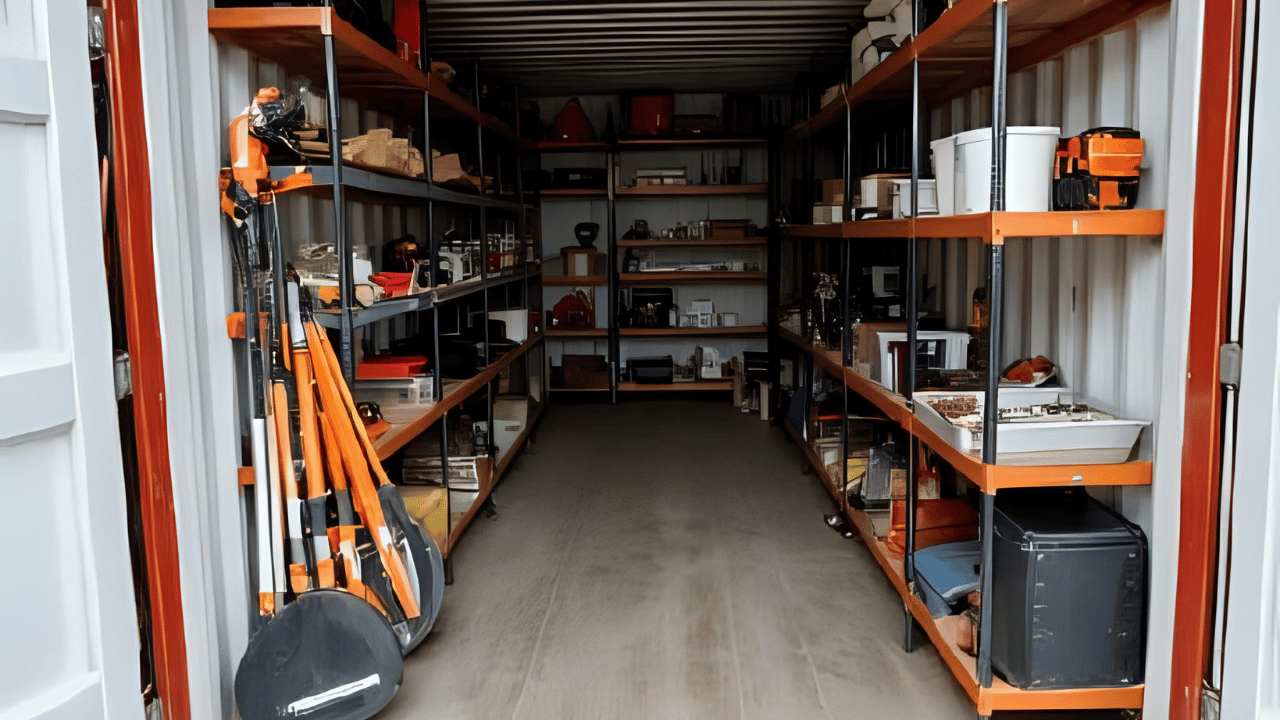
Step 2: Add Shelving and Racks
Using industrial shelves or pegboards keeps tools visible and off the floor. A tip from site managers: use magnetic strips to hang smaller items—this simple upgrade can save minutes per task.
Step 3: Secure Your Container
Install a robust padlock and consider motion-sensor lights or cameras if your site is in a high-risk area. Many professionals layer security by welding a lockbox over the latch.
Step 4: Maintain the Inside Environment
Although shipping containers are sealed, condensation can build up. Add vents or small dehumidifiers to protect metal tools from rust.
Practical Tips to Maximize Space and Efficiency
When space is limited, every inch counts. Here’s how you can make the most out of your container for construction tools storage:
- Create zones: Divide the container into sections: one for hand tools, one for paints or adhesives, and another for larger machinery.
- Use vertical storage: Stack bins or install cabinets along the walls rather than sprawling equipment across the floor.
- Keep an inventory list: Label containers or use QR codes for quick identification. A digital tool tracker helps reduce losses in fast-paced construction projects.
A contractor working on urban renovation projects switched from a wooden tool shed to a 20-foot shipping container. The result? Zero theft incidents in six months and faster morning setups since all tools stayed in one secure place.
FAQs
- Do I need a permit to use a shipping container for tool storage?
In most areas, containers used temporarily on job sites don’t need permits, but regulations vary. Always check local zoning rules before installation. - How can I modify a shipping container for better tool organization?
You can install shelving, lighting, ventilation, and even insulation to create an efficient, weather-resistant workspace tailored to your tools and workflow.
A shipping container for construction tools storage isn’t just a metal box, it’s a long-term asset that secures your investment, streamlines your operations, and keeps your projects running smoothly.